

Table of Contents
- Understanding Canvas Print Resolution Requirements
- How to Check Image DPI for Printing
- Physical Inspection of Canvas Construction
- Signs of Poor Quality Canvas Prints
- Checking Color Accuracy and Saturation
- Testing Edge Wrapping and Corner Tightness
- What to Do If Your Canvas Art Falls Short
- Conclusion
Last Updated: August 15, 2026
Understanding Canvas Print Resolution Requirements
Resolution determines whether your canvas print will look crisp and detailed or soft and pixelated. Most people assume that because an image looks good on a screen, it will print beautifully on canvas, it won't. The relationship between your digital file and the physical canvas is governed by DPI (dots per inch) and pixel dimensions. Understanding these measurements is essential to verify print quality before you buy.
African American Expressions has spent over 34 years sourcing and producing high-quality canvas art that celebrates Black heritage and culture. When evaluating canvas prints from any provider, including African American Expressions, these resolution standards are non-negotiable markers of quality.
DPI and PPI Explained
DPI (dots per inch) and PPI (pixels per inch) are often used interchangeably but describe slightly different things. PPI refers to pixel density in a digital image file; DPI refers to physical dot density when printed. For canvas printing, the industry standard is 150-300 DPI at the final print size. Canvas has visible texture that naturally softens fine details compared to glossy photo paper, so 150 DPI will look sharp from normal viewing distance.
A file that looks acceptable on a 27-inch monitor at 100% zoom will often fail as a canvas print examined from arm's length. Screens display pixels at much lower density than printed canvas. What reads as crisp on screen can reveal pixelation, color banding, and loss of detail when enlarged to physical dimensions.
Pixel Dimensions and Viewing Distance
The actual pixel dimensions of your image determine how large you can print it while maintaining quality. A 2,000-pixel-wide image printed at 150 DPI produces approximately a 13-inch-wide print; at 300 DPI, only 6.5 inches wide.
Viewing distance matters significantly. A 48-inch canvas hanging above a sofa viewed from 8 feet away can tolerate slightly lower resolution than a 12-inch print examined from 12 inches away. Calculate your required pixel dimensions before printing: multiply the intended width in inches by 150, then the height in inches by 150. If your source image falls short, the printer will have to interpolate (artificially enlarge) the image, which always degrades quality.
How to Check Image DPI for Printing
Before ordering a canvas print, examine the actual file properties to catch problems before they become expensive mistakes.
Checking File Properties Before Printing
Open your image file in any image editing software, Photoshop, GIMP, or Preview on a Mac. Look for the Image menu and select Image Size or Document Properties. This displays pixel width, pixel height, and current DPI.
The DPI listed in file properties is often misleading. What actually matters is pixel dimensions divided by your intended print size. A file marked as 72 DPI with 3,000 pixels wide can still produce a high-quality 20-inch print at 150 DPI (3,000 ÷ 20 = 150). Most professional canvas printers reject files below 100 DPI at final print size and issue warnings for anything below 150 DPI. Verify your own numbers before uploading rather than relying on the printer to upscale.
Using Soft Proofing Tools
Soft proofing simulates how your image will look when printed before you actually print it. Many online canvas retailers offer this feature directly in their ordering system. Upload your image, specify the canvas size, and the software shows a preview of the final print.
This preview catches obvious problems like pixelation, color shifts, and unexpected cropping. Pay attention to edges and fine details. If text or thin lines appear fuzzy or jagged in the preview, they will be worse on the actual canvas.
Physical Inspection of Canvas Construction
The quality of the canvas material itself is separate from print quality, but both matter. A beautifully printed image on cheap, thin canvas will disappoint you within months as the material deteriorates.
Evaluating Stretcher Bars and Frame Tension
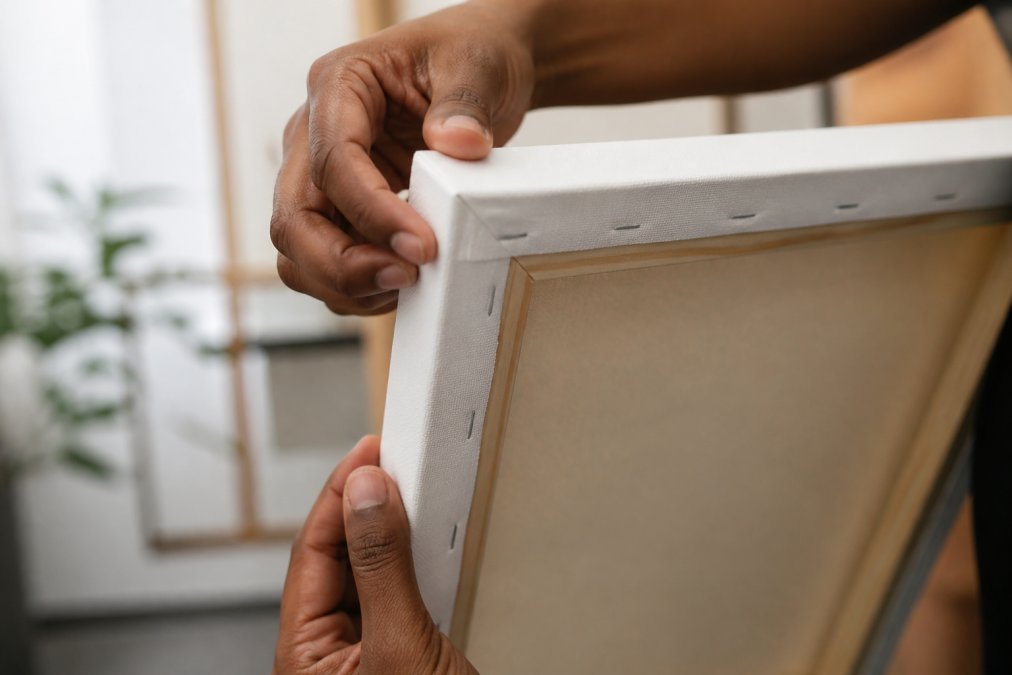
The stretcher bars are the wooden frame holding the canvas taut. These should be solid wood, not cardboard or thin plywood. Quality stretcher bars are typically 1.5 inches thick and made from kiln-dried pine or similar material that resists warping.
The canvas should be stretched evenly and tightly across these bars. Press gently on the canvas surface, it should have minimal give, like a drum head. If the canvas feels loose or sags when pressed, the stretcher bars are too thin or the canvas wasn't stretched properly. Check the corners carefully; the canvas should wrap tightly with clean, even folds. The back should show a clean wrap with no visible gaps between the canvas edge and the stretcher bar frame.
Assessing Canvas Texture and Material Quality
Canvas comes in different weights and textures. Heavier canvas (typically 10-13 ounces per square yard) is more durable and less prone to sagging than lighter canvas. Feel the canvas surface, quality canvas has a consistent weave with no thin spots or loose areas.
The material should be 100% cotton or a cotton-polyester blend, not 100% polyester or synthetic materials. Cotton canvas ages better and produces more authentic color reproduction. Check any documentation for material specifications. If the retailer won't specify the canvas material, that's a warning sign.
Signs of Poor Quality Canvas Prints
Knowing what to look for when your canvas arrives means you can request replacements or refunds before accepting substandard work.
Pixelation, Banding, and Color Shifts
Pixelation appears as visible blocks or mosaic-like patterns, especially in areas with gradual color transitions like skies or skin tones. This happens when source image resolution was too low and the printer enlarged it beyond its capability. Once pixelation appears, it cannot be fixed.
Become a part of our AAE family and start fundraising today! →
Color banding occurs when smooth gradients break into visible stripes of distinct colors instead of transitioning smoothly. This usually indicates a low-quality source image or incorrect printer color profile settings. Color shifts happen when printed colors don't match the original image. This can result from incorrect color profile conversion, poor printer calibration, or using the wrong color space when preparing the file.
Canvas Sagging, Warping, and Edge Problems
Canvas that sags in the middle or appears to have waves or ripples is experiencing tension loss. This happens when stretcher bars are too thin, the canvas wasn't stretched tightly enough, or the canvas material is poor quality. Environmental factors like humidity changes can accelerate sagging, but quality construction prevents it.
Edge problems include uneven, loose, or poorly finished canvas wrapping. The edges should be clean and tight with no visible gaps, wrinkles, or areas where the canvas is pulling away from the frame.
Checking Color Accuracy and Saturation
The color in your finished canvas print should match your source image as closely as possible, accounting for the limitations of print media.
Color Profile Standards and Pigment Inks
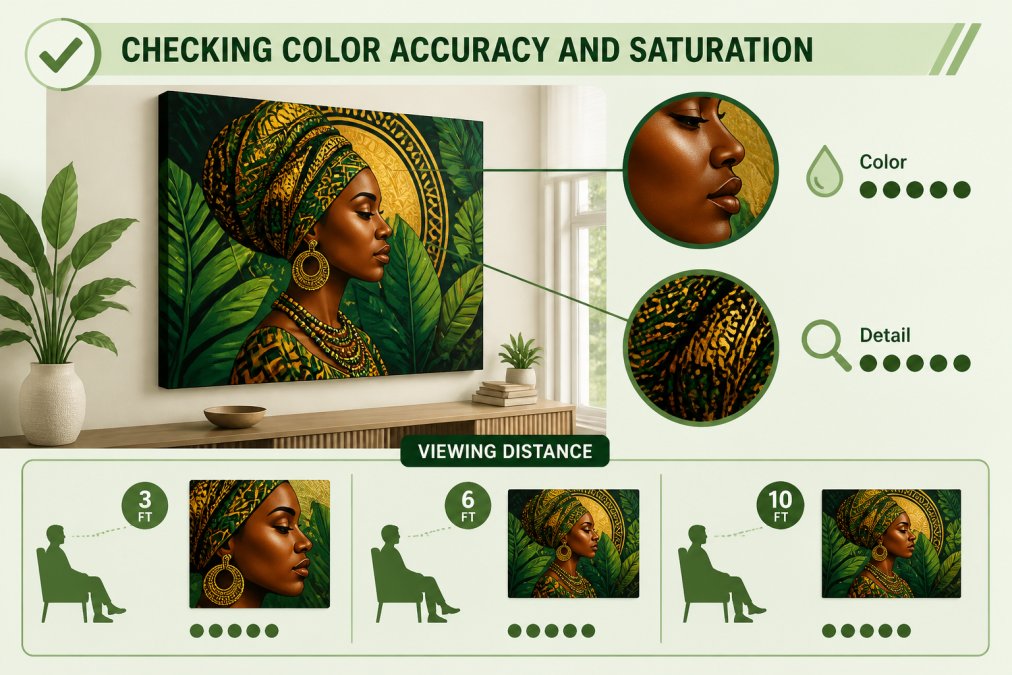
Professional canvas printers use pigment-based inks, not dye-based inks. Pigment inks are more archival, resisting fading over time and maintaining color accuracy for decades. The color profile used during printing is critical. Most canvas printers work in either sRGB or Adobe RGB color space. Your source image should be prepared in the same color space the printer uses. Ask your printer which color profile they use and ensure your image is in that profile before uploading.
Canvas prints naturally have slightly lower saturation than digital displays because canvas material reflects light differently than a screen emits it. This is normal. However, colors should still be vibrant and true to the original image. If colors appear washed out or dull, either the source image had low saturation or the printer's color settings are off.
Lighting Conditions for Proper Inspection
Never evaluate color accuracy under artificial lighting alone. Examine your canvas print under natural daylight from a window if possible. Daylight reveals true colors without the color cast of artificial lighting. If natural light isn't available, use a neutral white LED light source rated around 5000K color temperature.
View the print from multiple distances and angles. Stand directly in front of it, then step back 5-6 feet. Quality prints maintain consistent color and detail across all viewing angles and distances.
Testing Edge Wrapping and Corner Tightness
The edges and corners of a canvas print are where construction quality becomes immediately visible. Examine how the canvas wraps around the sides of the stretcher bars. The wrap should be smooth and tight with no wrinkles, gaps, or loose areas.
At each corner, the canvas should create clean, tight folds with no bunching or excess material. Professional assembly creates mitered corners with sharp, clean angles. Check the back of the canvas as well, it should be as neat as the front with no loose threads, uneven wrapping, or backing nails coming loose.
What to Do If Your Canvas Art Falls Short
If your canvas arrives and doesn't meet quality standards, document the problems with clear photographs taken under good lighting. Most reputable canvas retailers stand behind their work and will replace prints that fail to meet quality standards.
Contact the retailer's customer service with your photos and a clear description of the issues. Be specific about how colors differ or describe the exact location and severity of physical problems. Reputable retailers will either replace the canvas or offer a refund. Understand the return policy before ordering.
If you receive a replacement with the same issues, the problem may be with your source image rather than the printing process. Work with the retailer's design team to adjust the image, increasing resolution, correcting color profile, or adjusting saturation, before reprinting.
Verifying print quality of canvas art requires attention to both the digital file and physical construction. Start with the fundamentals: ensure your source image has sufficient resolution for your intended print size, check file properties before uploading, and use soft proofing tools to catch problems early. When your canvas arrives, inspect the stretcher bars, canvas material, edge wrapping, and color accuracy under proper lighting. Knowing how to verify quality ensures you receive work that honors the artistry and cultural significance behind it.
Frequently Asked Questions
What resolution is needed for a high-quality canvas print?
A minimum of 150 DPI (dots per inch) is acceptable for canvas prints viewed from normal distances, though 300 DPI provides superior sharpness and detail. The required pixel dimensions depend on your final canvas size, a 16x20 inch print needs at least 2,400x3,000 pixels at 150 DPI. Higher resolution files give your printer more data to work with, resulting in sharper edges, smoother gradients, and richer color depth.
How can you tell if a canvas print has poor quality pigment inks?
Poor quality pigment inks often show uneven color saturation, dull or faded tones, and visible color shifts across the canvas surface. Look for banding (visible color bands instead of smooth gradients) and check if the colors appear vibrant under proper lighting. High-quality pigment inks produce consistent, archival-grade color that resists fading. If the print looks flat or washed out compared to the original digital image, the ink quality may be substandard.
What are the signs of poor quality canvas prints I should watch for?
Common signs include pixelation or blurriness, especially in fine details; visible color banding in gradients; sagging or warping of the canvas surface; loose or uneven stretcher bars; wrinkled or improperly wrapped edges; and color inaccuracy compared to the original image. Canvas sagging indicates inadequate frame tension, while loose corners suggest the canvas wasn't properly secured during mounting. Inspect under good lighting to spot these defects before accepting delivery.
How do I check if my image file has the right DPI for canvas printing?
Open your image file in photo editing software like Photoshop or free alternatives like GIMP, then check Image > Image Size or Properties. You'll see the DPI (or PPI) listed there. Multiply the DPI by the intended print width and height to confirm pixel dimensions. For example, a 16x20 inch print at 300 DPI requires 4,800x6,000 pixels. If your file is below 150 DPI at your target size, image interpolation may be needed, though this can reduce sharpness.
This article was written using GrandRanker